BlogTeknologiBelajar Laravel untuk Pemula: Dari Nol ke Halaman...
Teknologi
Belajar Laravel untuk Pemula: Dari Nol ke Halaman Pertama
Panduan Laravel untuk pemula absolut. Setup VS Code + extensions, install PHP & Composer, buat project, jalankan server, buat halaman pertama — semua dijelaskan langkah demi langkah.
Laravel adalah framework PHP paling populer di dunia. Artikel ini ditulis untuk kamu yang benar-benar mulai dari nol. Di akhir artikel, kamu akan punya halaman web pertama yang berjalan di browser — semuanya dikerjakan dari VS Code.
Apa itu Laravel?
Bayangkan membangun rumah. Kamu bisa mulai dari nol — cetak batu bata sendiri, buat pondasi dari tanah — atau beli rumah setengah jadi yang fondasinya sudah kokoh. Laravel adalah "rumah setengah jadi" untuk aplikasi web. Sistem routing, keamanan, koneksi database, validasi form — semua sudah tersedia. Kamu tinggal fokus membangun fitur.
Laravel menggunakan pola MVC untuk mengorganisir kode supaya rapi:
Bagian
File Ada di
Tugasnya
Model
app/Models/
Ambil & simpan data ke database
View
resources/views/
Tampilan HTML yang dilihat user
Controller
app/Http/Controllers/
Logika — terima request, olah, kirim ke View
📋 Progress Belajarmu
Centang tiap langkah yang sudah selesai. Progress tersimpan otomatis di browser!
① Setup VS Code
VS Code (Visual Studio Code) adalah code editor gratis dari Microsoft yang digunakan mayoritas developer web profesional. Kita akan pakai VS Code sebagai pusat kerja — menulis kode, menjalankan server, dan mengelola file semuanya dari satu tempat.
Langkah Setup VS Code:
1. Install VS Code
Buka browser → buka code.visualstudio.com → klik Download → pilih sesuai OS → install seperti aplikasi biasa.
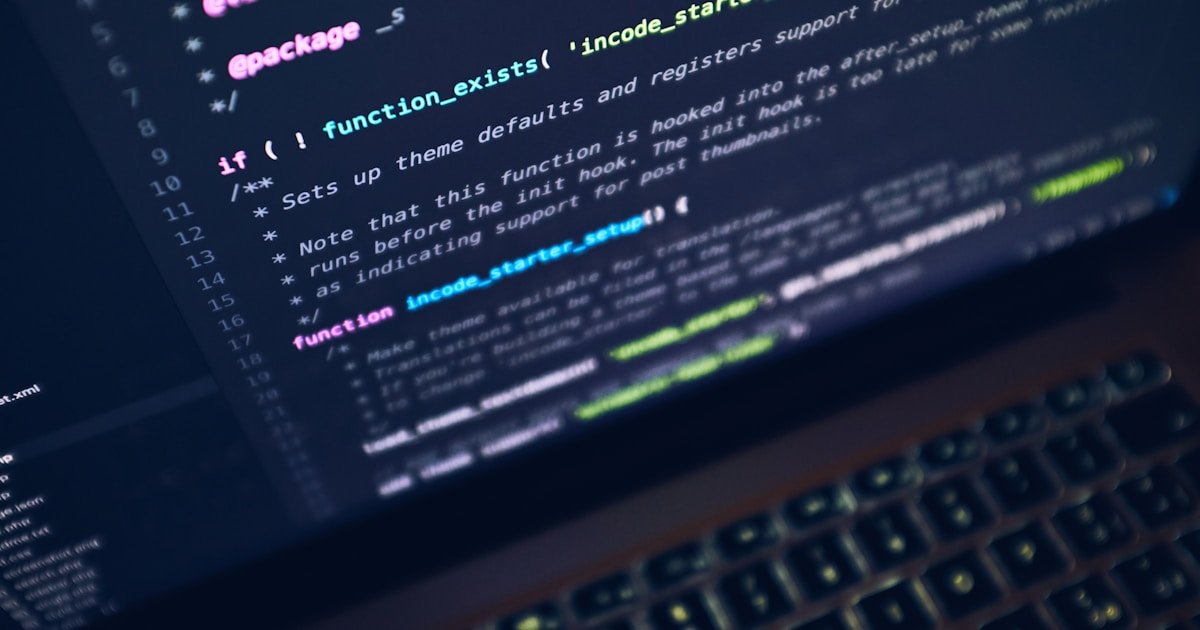
2. Install Extension: PHP Intelephense
🐘
PHP Intelephense
oleh Ben Mewburn · 30 juta+ install
Autocomplete cerdas, deteksi error real-time, go-to-definition untuk PHP. Wajib untuk PHP developer.
📌 Cara install: Tekan Ctrl+Shift+X di VS Code → cari "PHP Intelephense" → klik Install.
3. Install Extension: Laravel Blade Snippets
🍃
Laravel Blade Snippets
oleh Winnie Lin
Syntax highlighting warna dan shortcut snippet untuk file .blade.php — kode jadi lebih mudah dibaca dan ditulis.
📌 Cari "Laravel Blade Snippets" di Extensions panel → Install.
4. Cara Buka Terminal di VS Code
Tekan Ctrl + ` (backtick — tombol di sebelah kiri angka 1) ATAU klik menu Terminal → New Terminal. Terminal muncul di bawah editor dan otomatis berada di folder project yang sedang dibuka — tidak perlu cd manual.
② Install PHP dan Composer
Sebelum bisa membuat project Laravel, dua tools ini harus ada di komputermu.
Install PHP
Pilih instruksi sesuai OS kamu:
Download dan install XAMPP dari apachefriends.org. XAMPP adalah paket yang sudah include PHP di dalamnya — install seperti aplikasi biasa, tidak perlu konfigurasi tambahan.
Setelah install XAMPP, coba restart VS Code lalu cek di terminal: php -v
Mac biasanya sudah ada PHP bawaan. Cek dulu:
php -v
Jika perlu versi terbaru, install via Homebrew: install Homebrew dulu dari brew.sh, lalu brew install php
Composer adalah package manager PHP — alat untuk download dan mengelola library/package termasuk Laravel itu sendiri.
Download Composer-Setup.exe dari getcomposer.org → klik "Download" → jalankan installer → ikuti langkah-langkahnya. Installer akan otomatis menemukan PHP dari XAMPP.
Banyak teks akan berjalan di terminal — Composer sedang mendownload semua file yang dibutuhkan. Butuh 1–3 menit tergantung internet. Tunggu sampai kursor siap input lagi.
④ Buka Project di VS Code
Masuk ke folder project lalu buka langsung di VS Code:
cd belajar-laravel
code .
Penjelasan:
cd belajar-laravel — masuk ke dalam folder project. code . — buka folder ini di VS Code. Titik (.) artinya "folder saat ini". VS Code akan terbuka dengan project di sidebar kiri.
⚠️ Kalau code . tidak bekerja di Mac:
Buka VS Code → tekan Cmd+Shift+P → ketik "Shell Command" → pilih Install 'code' command in PATH → coba lagi.
Setelah VS Code terbuka, kamu akan melihat struktur folder di sidebar kiri. Untuk pemula, fokus pada tiga folder ini dulu:
📁 BELAJAR-LARAVEL
├── 📁 routes/
│   └── web.php              ← DAFTAR URL website kamu
├── 📁 resources/
│   └── 📁 views/            ← FILE HTML tampilan
│       └── welcome.blade.php
└── 📁 app/
    └── 📁 Http/
        └── 📁 Controllers/  ← LOGIKA program (nanti)
Dari VS Code ini, buka terminal internal dengan Ctrl+`. Terminal langsung berada di dalam folder project.
⑤ Jalankan Server
Di terminal VS Code, ketik:
php artisan serve
Output yang muncul:
   INFO  Server running on [http://127.0.0.1:8000].

   Press Ctrl+C to stop the server
⚠️ Jangan tutup terminal ini!
Server berjalan selama terminal terbuka. Kalau perlu mengetik command lain, buka terminal baru di VS Code dengan klik tombol + di panel terminal bawah, atau tekan Ctrl+Shift+`.
⑥ Buka di Browser
Buka browser dan ketik di address bar:
http://localhost:8000
Apa itu localhost? localhost adalah nama untuk komputermu sendiri. Website ini berjalan di komputermu saja — belum bisa diakses orang lain. Nanti setelah selesai development, baru di-deploy ke server online.
⑦ Buat Halaman Pertama
Di VS Code, klik file routes/web.php di sidebar kiri. Isinya kurang lebih:
Route::get('/', function () {
    return view('welcome');
});
Artinya: "Kalau user buka halaman utama (/), tampilkan file view bernama welcome."
Tambahkan route baru di bawahnya:
Route::get('/', function () {
    return view('welcome');
});

// Tambahkan ini:
Route::get('/halo', function () {
    return 'Halo Dunia! Ini halaman pertamaku.';
});
Simpan dengan Ctrl+S. Buka http://localhost:8000/halo di browser — teks langsung tampil. Tidak perlu restart server.
Buat File View (Tampilan HTML)
Di VS Code sidebar, buka folder resources/views/. Klik kanan → New File → beri nama halaman-saya.blade.php.
Kenapa .blade.php? Blade adalah sistem template bawaan Laravel. File .blade.php bisa mengandung HTML biasa plus sintaks khusus Blade seperti {{ }} dan @foreach. VS Code dengan extension Laravel Blade Snippets akan mewarnai sintaks ini dengan benar.
Isi file tersebut dengan kode berikut:
<!DOCTYPE html>
<html lang="id">
<head>
    <meta charset="UTF-8">
    <title>Halaman Pertamaku</title>
    <style>
        body { font-family: sans-serif; max-width: 600px; margin: 60px auto; padding: 0 20px; }
        h1   { color: #0f766e; }
        p    { color: #475569; line-height: 1.7; }
    </style>
</head>
<body>
    <h1>Halo dari Laravel!</h1>
    <p>Ini halaman pertamaku yang dibuat dengan framework Laravel.</p>
</body>
</html>
Update route /halo di routes/web.php untuk menggunakan view ini:
{{ $nama }} — tampilkan variabel (otomatis aman dari XSS) @foreach ($hobi as $item) — ulangi untuk setiap item di array @endforeach — penutup loop
Ringkasan Alur Kerja Laravel
User buka URL di browser → http://localhost:8000/halo
Laravel cek routes/web.php — ada tidak route untuk /halo?
Kalau ada, jalankan fungsi yang terdaftar
Fungsi kirim data ke View (file blade)
View render HTML dan kirim ke browser
Langkah Selanjutnya
Controller — pisahkan logika dari route ke file terpisah
Database & Migration — simpan dan ambil data dari database
Eloquent ORM — cara Laravel berinteraksi dengan database
Form & Validasi — terima dan validasi input dari user
Authentication — sistem login siap pakai bawaan Laravel
Kalau Ada Error
Jangan panik. Laravel memberikan pesan error yang sangat detail di browser — baca pesannya, biasanya langsung ketahuan masalahnya. Kalau belum paham, copy pesan error ke Google atau tanya ke ChatGPT. Hampir semua error yang kamu temui sudah pernah dialami orang lain.
Laravel is the most popular PHP framework in the world. This article is written for those of you who really start from scratch. At the end of the article, you'll have the first web page running in the browser — all done from VS Code.
What is Laravel?
Imagine building a house. You can start from scratch — print your own bricks, make a foundation from the ground — or buy a half-finished house with a solid foundation. Laravel is a "halfway house" for web applications. Routing system, security, database connection, form validation — all are available. You just have to focus on building features.
Laravel uses the MVC pattern to organize the code neatly:
Department
File Exists in
Its job
Model
app/Models/
Fetch & save data to database
View
resources/views/
HTML display seen by the user
Controller
app/Http/Controllers/
Logic — accept requests, process, send to View
Your Learning 📋 Progress
Check off each completed step. Progress is auto-saved in the browser!
① Setup VS Code
VS Code (Visual Studio Code) is a free code editor from Microsoft used by the majority of professional web developers. We'll use VS Code as a work hub — writing code, running servers, and managing files all from one place.
Setup VS Code steps:
1. Install VS Code
Open a browser → open code.visualstudio.com → click Download → select according to OS → install like a regular application.
2. Install Extension: PHP Intelephense
🐘
PHP Intelephense
by Ben Mewburn · 30 million+ installs
Intelligent autocomplete, real-time, go-to-definition error detection for PHP. Mandatory for PHP developers.
📌 How to install: Press Ctrl+Shift+X in VS Code → search for "PHP Intelephense" → click Install.
3. Install Extension: Laravel Blade Snippets
🍃
Laravel Blade Snippets
by Winnie Lin
Color highlighting syntax and snippet shortcuts for .blade.php files — the code is easier to read and write.
📌 Search for "Laravel Blade Snippets" in the Extensions → Install panel.
4. How to Open a Terminal in VS Code
Press Ctrl + ` (backtick — button to the left of number 1) OR click the Terminal → New Terminal menu. The terminal appears below the editor and automatically resides in the currently opened project folder — no manual cd is required.
② Install PHP and Composer
Before you can create a Laravel project, these two tools must be on your computer.
Install PHP
Select the instructions according to your OS:
Download and install XAMPP from apachefriends.org. XAMPP is a package that includes PHP in it — install it like a regular application, no additional configuration is needed.
After installing XAMPP, try restarting VS Code then check in the terminal: php-v
Macs usually have built-in PHP. Check first:
php -v
If you need the latest version, install it via Homebrew: install Homebrew first from brew.sh, then brew install php
Composer is a PHP package manager — a tool for downloading and managing libraries/packages including Laravel itself.
Download Composer-Setup.exe from getcomposer.org → click "Download" → run the installer → follow thesteps. The installer will automatically find PHP from XAMPP.
A lot of text will run in the terminal — Composer is downloading all the required files. It takes 1-3 minutes depending on the internet. Wait until the cursor is ready to input again.
④ Open Project in VS Code
Go to the project folder and open it directly in VS Code:
cd belajar-laravel
code .
Penjelasan:
cd belajar-laravel — masuk ke dalam folder project. code . — buka folder ini di VS Code. Titik (.) artinya "folder saat ini". VS Code akan terbuka dengan project di sidebar kiri.
⚠️ Kalau code . tidak bekerja di Mac:
Buka VS Code → tekan Cmd+Shift+P → ketik "Shell Command" → pilih Install 'code' command in PATH → coba lagi.
Once VS Code is open, you will see the folder structure in the left sidebar. For beginners, focus on these three folders first:
📁 BELAJAR-LARAVEL
├── 📁 routes/
│   └── web.php              ← DAFTAR URL website kamu
├── 📁 resources/
│   └── 📁 views/            ← FILE HTML tampilan
│       └── welcome.blade.php
└── 📁 app/
    └── 📁 Http/
        └── 📁 Controllers/  ← LOGIKA program (nanti)
From this VS Code, open the internal terminal with Ctrl+ '. The terminal is directly inside the project folder.
Run Server
In the VS Code terminal, type:
php artisan serve
Outputs appearing:
   INFO  Server running on [http://127.0.0.1:8000].

   Press Ctrl+C to stop the server
⚠️ Jangan tutup terminal ini!
Server berjalan selama terminal terbuka. Kalau perlu mengetik command lain, buka terminal baru di VS Code dengan klik tombol + di panel terminal bawah, atau tekan Ctrl+Shift+`.
⑥ Open in Browser
Open a browser and type in the address bar:
http://localhost:8000
Apa itu localhost? localhost adalah nama untuk komputermu sendiri. Website ini berjalan di komputermu saja — belum bisa diakses orang lain. Nanti setelah selesai development, baru di-deploy ke server online.
Create First Page
In VS Code, click on the routes/web.php file in the left sidebar. The contents are more or less:
Route::get('/', function () {
    return view('welcome');
});
It means: "If the user opens the main page (/), display a view file called welcome."
Add a new route below it:
Route::get('/', function () {
    return view('welcome');
});

// Tambahkan ini:
Route::get('/halo', function () {
    return 'Halo Dunia! Ini halaman pertamaku.';
});
Save with Ctrl+S. Go to http://localhost:8000/hello in the browser — the text immediately appears. No need to restart the server.
Create File View (HTML View)
In the VS Code sidebar, open the resources/views/folder. Right-click → New File → name my-page.blade.php.
Kenapa .blade.php? Blade adalah sistem template bawaan Laravel. File .blade.php bisa mengandung HTML biasa plus sintaks khusus Blade seperti {{ }} dan @foreach. VS Code dengan extension Laravel Blade Snippets akan mewarnai sintaks ini dengan benar.
Fill the file with the following code:
<!DOCTYPE html>
<html lang="id">
<head>
    <meta charset="UTF-8">
    <title>Halaman Pertamaku</title>
    <style>
        body { font-family: sans-serif; max-width: 600px; margin: 60px auto; padding: 0 20px; }
        h1   { color: #0f766e; }
        p    { color: #475569; line-height: 1.7; }
    </style>
</head>
<body>
    <h1>Halo dari Laravel!</h1>
    <p>Ini halaman pertamaku yang dibuat dengan framework Laravel.</p>
</body>
</html>
Update route /hello in routes/web.php to use this view:
{{ $nama }} — tampilkan variabel (otomatis aman dari XSS) @foreach ($hobi as $item) — ulangi untuk setiap item di array @endforeach — penutup loop
Laravel Workflow Summary
User opens the URL in the browser → http://localhost:8000/hello
Laravel check routes/web.php — no routes for /hello?
If applicable, run the listed function
Function send data to View (blade file)
View HTML render and send to browser
Next Steps
Controller — separate the logic of the route into separate files
Databases & Migration — save and retrieve data from databases
Eloquent ORM — how Laravel interacts with the database
Form & Validation — receive and validate input from users
Authentication — Laravel's built-in ready-to-use login system
Kalau Ada Error
Jangan panik. Laravel memberikan pesan error yang sangat detail di browser — baca pesannya, biasanya langsung ketahuan masalahnya. Kalau belum paham, copy pesan error ke Google atau tanya ke ChatGPT. Hampir semua error yang kamu temui sudah pernah dialami orang lain.
Siap Mulai Karir IT-mu?
Bergabung dengan ribuan alumni DebugGo yang sudah berhasil masuk industri teknologi.
Komentar 0